Luluké
  • Home
  • About
  • Collections
    • Sewing
    • Jewellry
    • Gallery
  • Services
  • Shop
    • Markets
  • Contact
    • Privacy Policy
    • Terms & Conditions
  • Friends
    • Luluké stockists
  • Blogs
    • Luluké - Create - Share - Inspire (Updates, Adventures, Challenges, Advice and Tutorials ...)
    • The Button - Highlighting local artists in and around Cleveland

Wednesday Club - A 12 week pop up club for young artists, and Luluké's top 5 online art resources for kids...

27/1/2016

0 Comments

 
"We didn't realize we were making memories,
we just knew we were having fun"
- Anon.
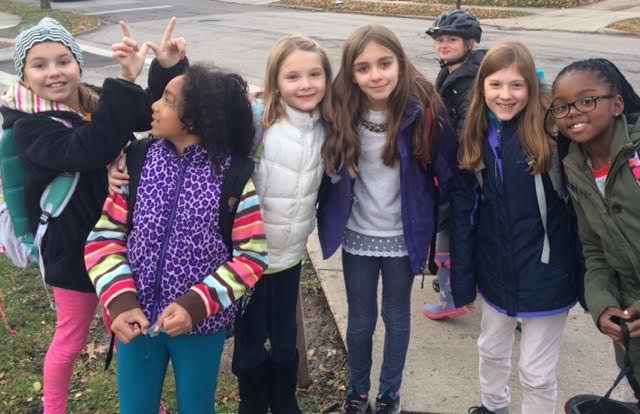
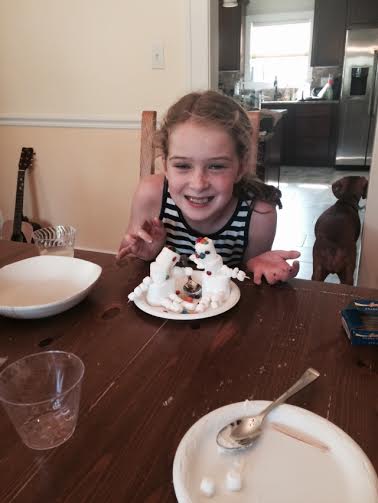
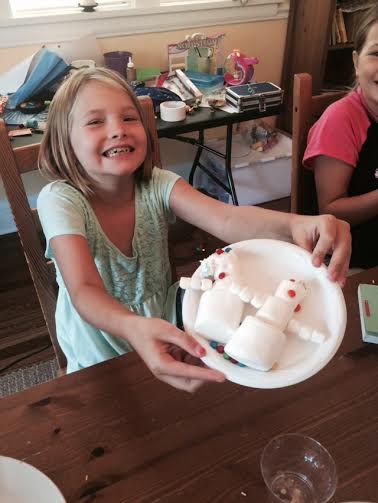
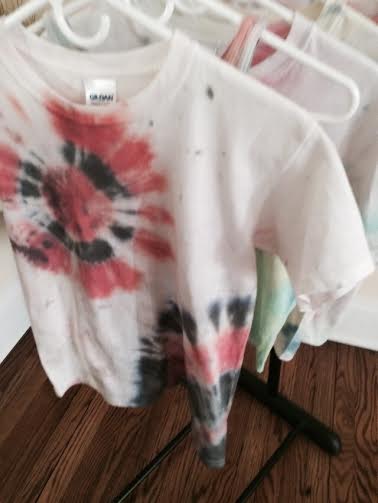
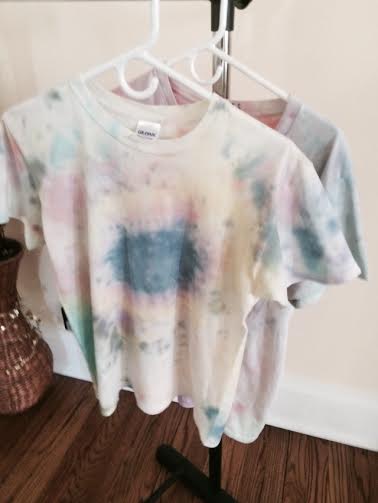
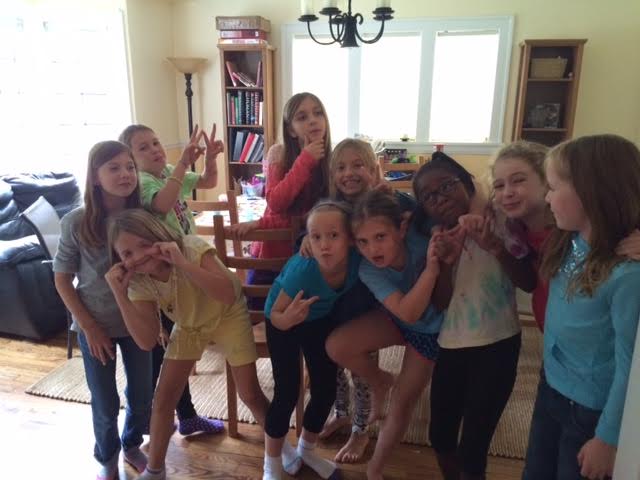
Some of you may of seen, heard or know about something called Wednesday Club. Quite simply, one day a small group of girls came back to our home for a big play date during the first week back to school, after a long and hot summer break.  The girls had so much fun they decided they wanted to do it again.  We called it "The Wednesday Club", because it just happened to be a Wednesday.  I suggested that if they wanted to meet up on a regular basis we could do something artistic each week.  Their little faces lit up, eyes open and smiles wide.  We all put some ideas down on paper and Wednesday Club was born.  It all happened very fast and for the 12 weeks that followed we had a fantastic time exploring the world of being artists together every Wednesday for a few hours.  The roll call quickly elevated from 5 to 13 girls, of which a different combination and number would turn up each week:
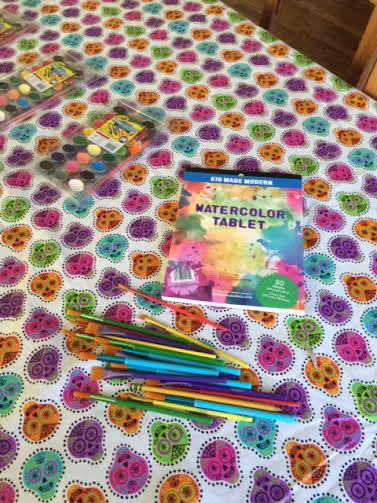
It became popular very quickly, even adults and international friends wanted in on the action after I posted up on Instagram or Facebook a picture of a tidy table ready and prepared, for a different art attack each time.  

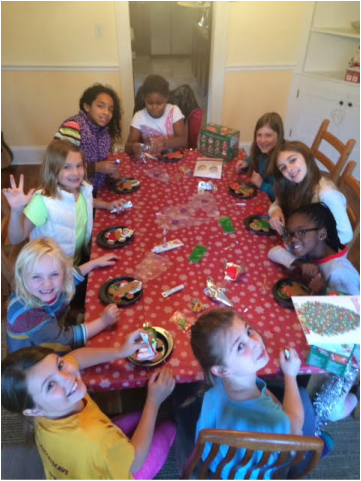
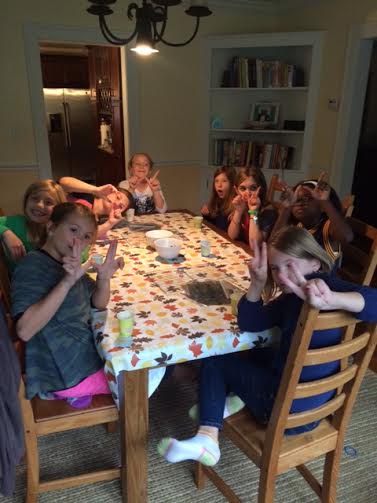
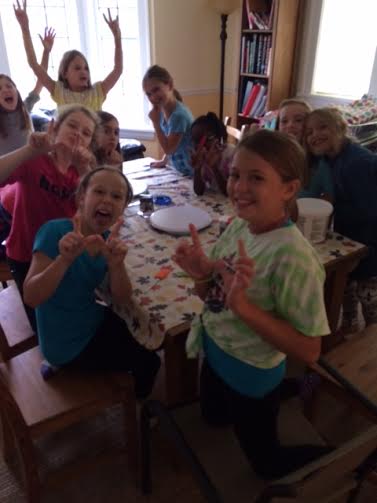
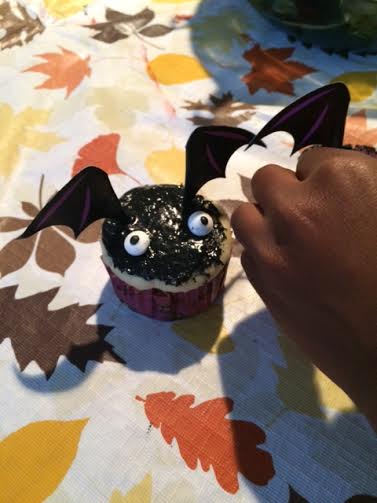
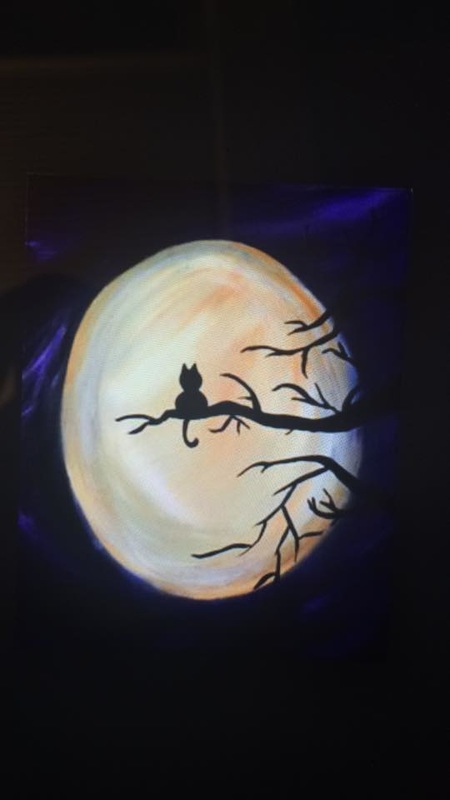
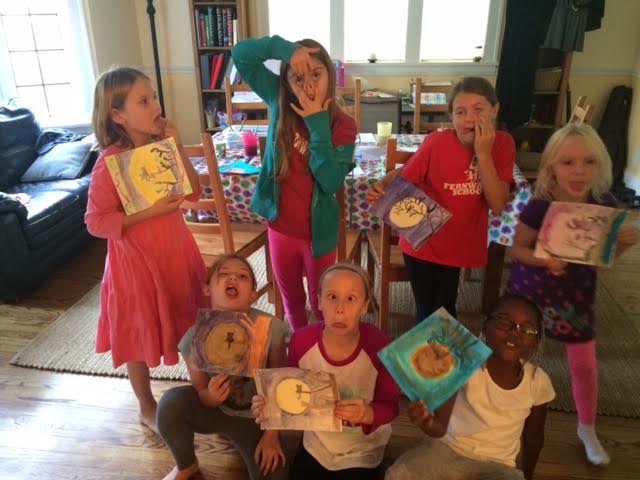
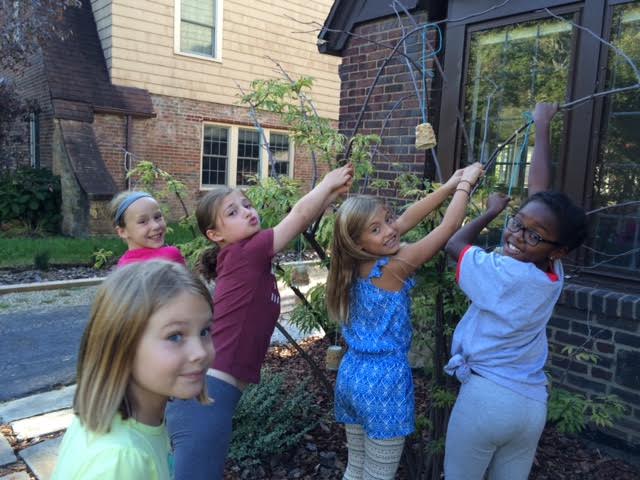
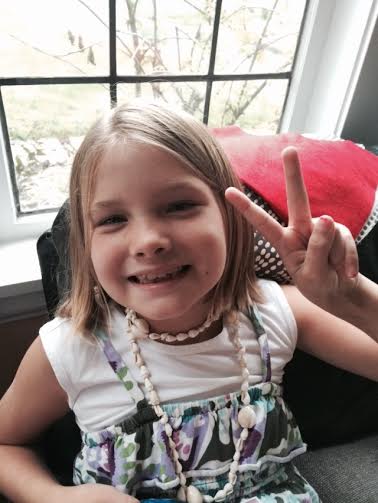
For me it ticked the box on a few things, not to mention preventing spontaneous play dates at the school gates.  Most importantly it allowed for a fixed period of time to focus on my daughter and her friends and think about what artistic activities would be fun and facilitate the joy of art and "I can do that".  I also thought of it as a little therapy to keep them ticking along during the transition from the long lazy or fun filled summer days to returning back to school. The girls started putting their two thumbs together to make a "W" sign and took great delight in expressing the 'W' sign as much as the peace sign as you may notice in some of the pictures.   We usually finished up with an English hot chocolate drink and a treat and the girls (or my trusted parent helpers) took it in turn helping to hand it all out.  The girls had a goal each week to work on together and they felt part of something different, exciting and positive.  In the back of my mind I felt it was worth the (sometimes colossal) effort, if it all fostered some positive social and emotional health beyond the classroom.  Strong and healthy relationships are so important for social and emotional well being for children, especially as they hurtle towards the tween and beyond years.  My relationship with my daughter is close and this brought us even closer and helped her/us to have something positive to focus on each week at a time where that was very much needed.  Here’s a rundown of our 12 weeks of Wednesday Club from August to December 2015:
  1. Marshmallow men.
  2. Tie Dye t-shirts.
  3. Pom pom bats, spiders and owls.
  4. Rainbow layer cakes (3 1/2 hours!)
  5. Bird feeders and telephones.
  6. Halloween cupcakes.
  7. Painting a Halloween scene in watercolors.
  8. Painting autumn fallen leaves in watercolors.
  9. Model magic and Veteran's Day flag painting.
  10. Thanksgiving cards and cupcakes.
  11. Plain old coloring.
  12. Christmas gingerbread cookie decorating.​
Picture
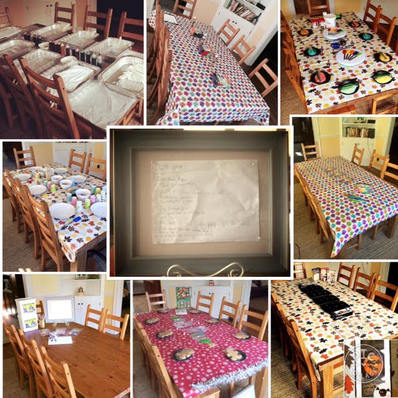
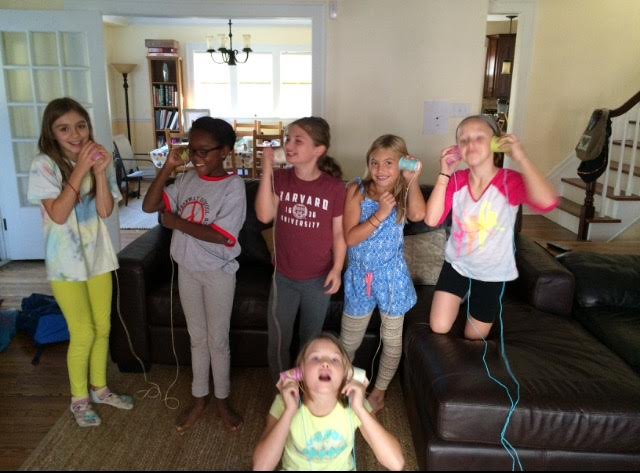
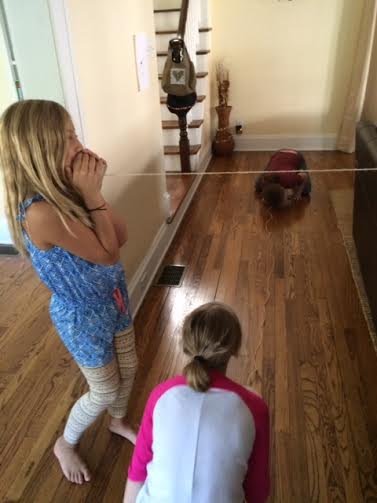
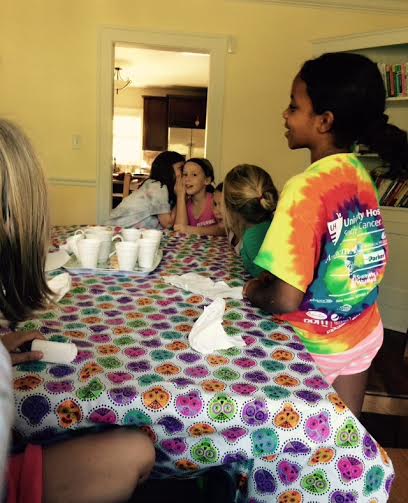
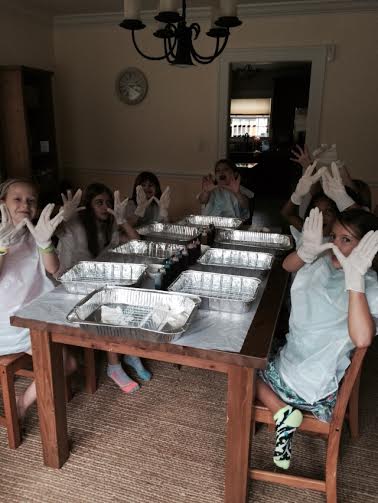
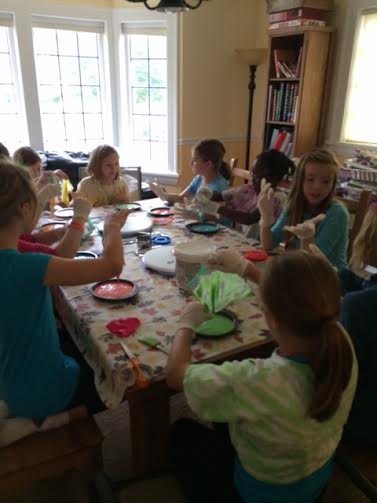
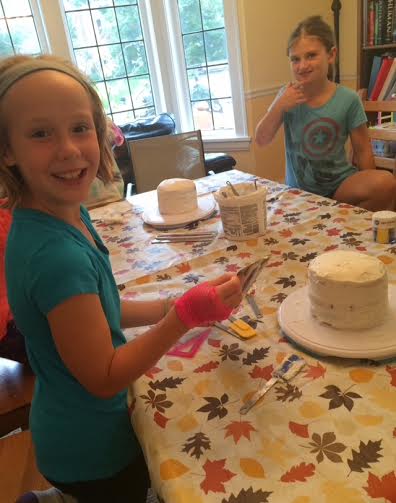
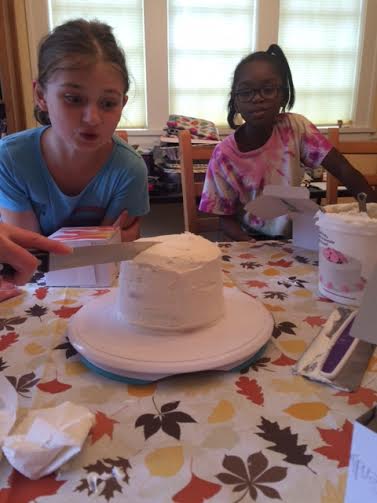
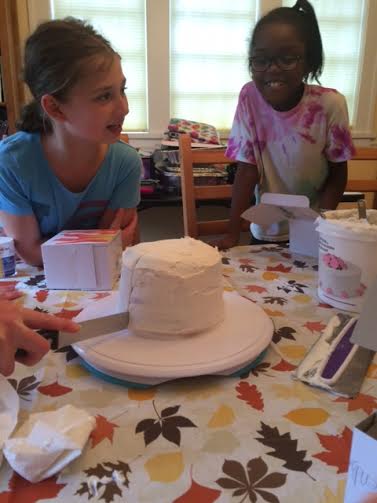
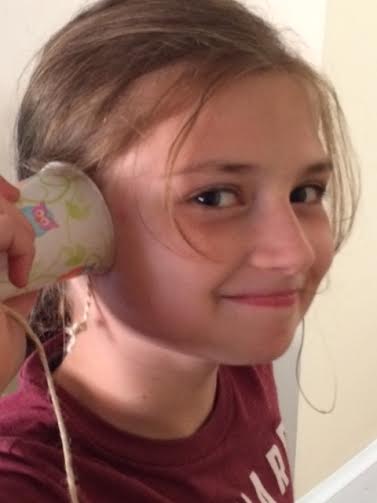
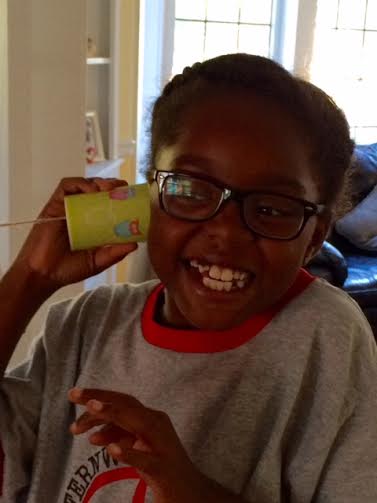
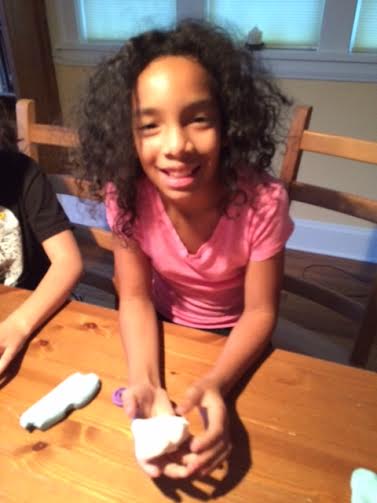
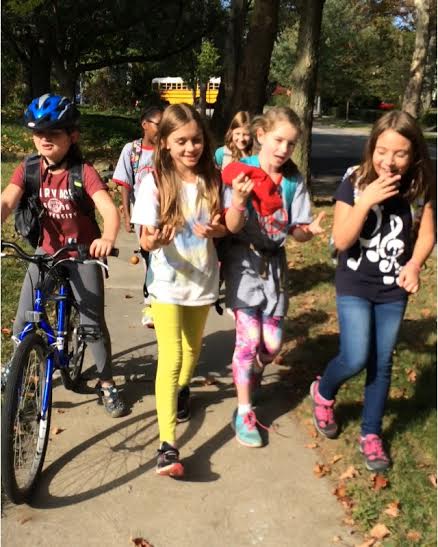
The girls walked from school each Wednesday to find the table ready and prepared for them to get started.  It became obvious to me quite quickly that we needed more than one activity sometimes, and we needed some standard guidelines on how to behave in a big excited group, so I encouraged the girls to come up with their own rules and I added only one... "NO furniture surfing!"  A long time personal bug bear of mine.  The sheer excitement sometimes became too much and became highly contagious with some running around like the house was on fire.  All I wanted was to maintain a sense of calm and send the little artists back home in one piece!  The girls were quite impressive, coming up with things such as "Respecting each other", "No talking over each other" and "Work as a team ALWAYS".  It became routine for one of the girls to read out the rules at the beginning of each get together, eventually all ending in unison.  I usually tied each week up with an email summary of our artistic adventures to all the parents, giving them heads up of what was coming the following week.  In the early days I found myself caught out with nothing to do after the girls had finished their art project.  One day before the girls rules became successfully routine I quickly thought on my feet and figured we could do a quiet activity in the form of Telephone, or Chinese Whispers as it's known in the UK.  It opened up discussion and debate about the dangers of gossip and how you can't rely on a third party for correct information - a valuable life lesson.   This week came to be one of my favorites (apologies for the shaky picture that follows but I was laughing with them),
Picture
After that little Wednesday Club lesson, I always had a back up plan to keep them focused after the initial project.  In no time it all ran smooth without hiccups.

One week the girls thought on their own feet with the left over cups from the bird feeders.  They turned them into telephones with the help of some string and had some good old fashioned fun (see the gallery hall of fame below for pics).  

In December we decided to finish up the weekly gathering due to my daughters increasingly busy soccer schedule, and Wednesday being her only reprieve in the week. I'm sure there will be the odd reunion from time to time, just not weekly, and I encouraged the parents to take up the artistic gauntlet too.
​  
On reflection, during those weeks it got me thinking about how and why I so easily agreed to this unusual gathering called the Wednesday Club which grew in unexpected popularity. Who and what had shaped my thinking that this was okay and doable... when most other parents were saying "Are you absolutely crazy?" or "Are you sure?", but that is for another blog post on another day.  I encourage all parents with children of all ages to form their own artist's club, and explore the joy and wonder of all that is art and the feeling of "I can do that".  Just a bit of advice, if you're planning on a group gathering think every step though and be prepared, be well prepared and most importantly, have fun!  Here's Luluké's top five list of kids art resources to get you started:
  1. http://www.redtedart.com
  2. http://www.thecraftingchicks.com
  3. http://www.howdoesshe.com/category/family/fun-with-kids
  4. http://www.kiwicrate.com
  5. http://www.oneartsymama.com

​This is a little belated but sending wishes of a fabulous and healthy 2016 to all!

With Love

Lou xoxo

​​

The Wednesday Club Hall of Fame:

A big THANK YOU goes out to all the parents for kindly allowing me to use these pictures.
0 Comments

Macramé sliding knot clasp tutorial (what? I hear some say), Hot Vinyasa yoga beginnings and a new range called the Bodhi Collection …

7/9/2015

0 Comments

 
“Your task is not to seek for love, but merely to seek and find all the barriers within yourself that you have built” 
– Rumi.
I’ve been working on becoming a busy little yogi (baby) recently by regularly attending hot vinyasa or slow burn yoga classes and challenging myself.  The most fascinating part of that first and last sentence were the last two words.

If you’ve ever naively (but with good intention) wandered into a hot vinyasa yoga class, full to the brim of soon-to-be drippy sweaty, heavy breathing, bendy yogis and managed not to walk out in the first 5 or 10 minutes (never to dare return) you will understand exactly what I mean.  For those of you that have no idea of what I’m on about or want to know more, I've taken the time to come up with my top 10 of how to approach hot vinyasa yoga for the first few weeks a little later on, just in case you’re interested in a personal journey of initial pose wobbles, repetition, shakes, stability, inner peace, well-being and liberation.

To honor my new awakenings with yoga, I’ve designed some yoga inspired Mala prayer necklaces and bracelets and other items to add toThe Bodhi Collection, a newly created and growing collection that encompasses yoga inspired jewelry.  Here’s some pictures of some of the new items from the collection that can be found in the Luluké shop:

Picture
Picture
Picture
Mala prayer beads are traditionally used for counting during meditation mantra and help to focus your mind. Those of you already familiar to yoga and meditation understand the powerful pathway to personal well-being and self-realization on multi levels.  Mala bracelets can come in bead numerations of 108, 36, 27, 18, 12, 9 or 6 (all divisions of 108 which make up a full Mala).  For more in-depth info on understanding meditation practice and traditional yoga I found this fantastic website, www.swamij.com  for you to explore if you so wish.

To help me launch this new range I had to learn how to create macramé (macra-may) sliding knots to help me get things started.  What’s macramé?  Quite simply, macramé is a form of knotting to create knot patterns.  If you are interested in learning more about macramé here’s an excellent website that shows you lots of different types of macramé http://fusionknots.com with links to free YouTube videos.  This is a close-up of the sliding macramé knot clasp I use:
Picture
and here’s a little video I made that explains step by step how to create it:
The reason I chose to blend macramé and yoga in this post is because both activities start out a little wobbly and lack strength, but as time goes on and you keep at it you start to see change, stability and strength.  The way these bracelets are made reminds me of a conversation I had with a lovely customer recently who described how they were starting to feel the physical limitations of growing older and how it was starting to seriously affect their day to day mobility and living.  This conversation also reminded me of my old job in the world of mental health, supporting people to understand and reach their personal wellness goals from start to finish, and how in my more youthful years my body worked more efficiently, and how up until recently I took that for granted. 

I've come to a point where the indulgences of the last couple of years, such as a few too many dates with easy going friends (Ben, Jerry, Bud and Chianti) and a lack of exercise has become only too evident.  I’ve realized, with the help of irritating sayings like "when you get to our age" and "life begins at 40", that it's too easy to get sucked into the belief that there's nothing you can do about the effects of aging or the aches and pains and you just have to give into it.  

I had a scare a few months ago where some of the muscles in my back and neck were so severely tied in tight knots, that one morning, I awoke with a head that felt way too heavy for its body.  Scarily, I couldn’t lift my arms to brush my hair or teeth, sit and sew or bead.  I burst into tears and felt completely helpless.   I quickly decided I wasn't buying into this getting old gig, without a fight back.  I started my recovery with a deep massage in the affected areas that made things feel initially worse for a couple of days and leaving me full of regret.  When I recovered from that experience I started focusing on my sitting posture more and started to attend regular yoga classes (mainly hot vinyasa) 4-6 times a week (yes, your allowed to call me insane) ... immediately followed by a 1-3 mile jog/run.  I was amazed at how much easier it was to walk at 4 mph without breaking a sweat and run at 6-7 mph with (unbelievable) ease, like I’d never been able to do before.

Apparently my demeanor is happier (to be honest, I feel it too) and my muscles (all over) feel more toned.  The cellulite that Ben, Jerry, Bud and Chianti helped me collect at the top, front and back of my thighs has received a well-deserved beating, my skin has more firmness and glow (all verified by my darling husband, to confirm it’s not just in my imagination) and I'm feeling more confident and healthy as each week passes by.  Also, I have already started to repeat what I've learned in class at home and prepared my own flow for when I went on holiday in August (I was a loyal yogi packing my mat and I committed to it!) and it's useful for when I don't have the time to hit the gym.  Although, I won't be turning the heat up at home to 90-100 degrees, as in Hot Vinyasa yoga.

Here's 10 tips for how to approach Hot Vinyasa/slow burn yoga group classes, if you're reasonably new to it:

1. Lose any inhibitions or self-awareness you may have of being in a group class, everyone there is there for their self-improvement and focused on what they’re doing, not you.  They all (well most) sweat and wobble so you will fit right in.  You may even experience moments of 'I CAN really do this' one day and then 'Oh my goodness I can’t balance to save my life' the next! Just don't give in to the latter. Try not to keep up with other yogis that seem to know everything with an elegant seamless flow.  They have practiced for a lot longer and you are just at the beginning of your journey.  You will be amazed at how quickly you start to change in your flow, elegance and confidence as the practices tally up and the weeks pass by.  You will also notice how firm your grounding is and your overall posture outside the yoga studio, not to mention the thoughts about what you can and cant do - yet.  I found this article to explain svadhyayh (self study) to help you understand what I'm on about in more detail: 

http://www.yogitimes.com/article/svadhyaya-self-study-reflection-eight-limbs-niyamas 

2. Remember and master your deep breathing (Ujjayi) from start to finish, otherwise you will not reap the full benefits.  This is not easy when you are in the full flow of things and will take lots of practice.  Here’s a video to help you:
3. Get over any fears about sweat, you're going to get drippy sweaty ... and so are most of everyone else around you.  It's good for you and your skin and proof to yourself that you are working hard on your health and well-being.  I’ve even noticed that I can tolerate hotter days a lot better now too.  You wouldn’t believe I used to fear sweat especially other peoples!  Just don't forget a couple of face towels on your way into the studio.

4. Invest in a good towel to go over your mat.  Instability can disturb your flow and a towel stops you slipping and crashing into an undignified heap on your mat (like I did a couple of times to begin with).  I quickly purchased a great fitted mat towel from www.namastay.com.  Every so often they have a 30% off offer so look out for that. The company was set up by a local Heights resident, which is a bonus too.  
If purchasing a towel is a stretch on your budget another solution to stop slipping is by placing a strap under your hands to secure them in place or use a regular towel.

5. Take child pose or any other pose you feel comfortable in at any point that feels right for you (I have included a link to correct poses later on).  Just remember to keep focused on your Ujjayi breath.   Here’s a video to demonstrate what Ujjayi breath is not:
6. Follow other yogis poses as much as you can if you get completely lost in the free flow (believe me there's not many classes that this hasn't happened to me yet).  It kinda contradicts the practice of svadhyayh, but your only just beginning.  After going a few times you will soon remember the different flows and you can always seek out the other regular yogis who know what they are doing.  There are of course some yogis you shouldn’t necessarily follow...
Alternatively, you can come up with your own flow that you feel comfortable with or want to improve on - At my local studio I hear the instructors repeatedly say "This is your practice, do what feels right for you".

7. If you mess up look around and find where you need to be and correct yourself.  Be kind to yourself.  If you start to wobble holding a pose it’s a good thing and it will strengthen you (just try it).  If you are in pain or too much discomfort stop and modify.  To feel pain in the belly of a muscle is okay and means you are building strength but to feel pain in muscles going into bones is not. Ask your instructor about any questions you may have. If you have a health issue that you feel limits you, mention it to them and they will help you to modify poses.  Obviously, if you have physical condition seek advice from a professional first.

8. When you have non instructional moments it's okay to improvise and go with your own flow or a pose of your choice or rest.  It’s also important to feel you are challenging yourself so make sure you get the balance right for you.  Read the quote at the beginning of this post again and you will understand what the foundation of yoga is about.

9. All instructors are different in their style and approach.  Find the ones that suit you and where you are in your practice.  Also, be mindful of the instructors style and try and find ones that walk around aiding people with their posture positions, gives advice and gets to know you.  Avoid ones that stand at the front just doing yoga with the expectation that you just follow.

10. The following link helps with going into more detail on each of the typical poses you may encounter and the correct posture:
http://www.yogajournal.com/category/poses/types/balancing/


Here's a list of local yoga teachers and online resources that I have come across in my journey so far I thought worth a share:

1. Local yoga instructors (and awesome friends I couldn't not mention): 
  • Yogabrained.com - Tammy Astor (An absolutely fabulous darling)
  • Eeperonyoga.com – Erin Esposito Peron (A very lovely and talented instructor with added skills in thai massage and more).
  • Lunapresenceyoga.com - Julie Konrad (I credit Julie for the "use it or lose it" mantra that has been on my mind since it escaped her lips, some time ago when I first arrived in the USA).

2. Lifetime Fitness - This is where I give a big shout out to Carrie T, Meghan B, Sarah M, Gina D and Sharon R for their teachings.  I appreciate everyone of them and I list their names in no particular order!

3. http://yogawithadriene.com - One of my favorite online yoga instructors.  I love the free videos on Adriene's site and what I love most about her is that she doesn’t take herself too seriously. Seriously, life is too short. If you look at her videos in more depth you will find that she also has a free 30 days of yoga series to warm you up.

4.  http://www.theasanaacademy.com/ - Another online favorite, sign up to Brian's blog to get fantastic tips, videos and advice, he's one of the most energetic and flexible yogis out there that Iv'e seen... and feel free to email him with a question, he will come straight back to you!

5.   duncanyoga.ca - Here's a quick 15 minute warm up yoga flow to relieve stress and warm you up for a run or just to start your day...
6.  I love this little video sequence ... probably because it was filmed in London:
7. The following video is very inspiring.  It’s not necessarily about Hot Vinyasa/slow burn Yoga but is about an amazing individual called Arthur Boorman and his yoga journey that inspired me to wake up and start taking yoga more seriously for LIFE.
If individuals like this can fight back against the odds, so can you (just be careful on your journey).  Remember, the reason I chose to blend macramé and yoga in this post is because both activities start out a little wobbly and lack strength but as time goes on and you keep at it you start to see change, stability and strength. Just believe in yourself.

Now, some of you may be thinking what does yoga have to do with hand made? My answer to you guys is that it's all handmade,  you don't need a ball or special shoes and you don't need a net.  You don't necessarily need a mat or a towel and you can break into a flow ANYWHERE you wish (on a mountain or the moon) and keep on top of your health and well being.  It's all within you.

I've sat on this post for quite a few weeks now and hesitated a few times about posting it.  The reason for my hesitation is because I've been discovering new things as each week has passed by with yoga and I started to sense that I may be missing out something important if I posted too quick.   I've now come back to my usual senses and outlook... that life is a journey where you have to let go of your fears (as you have to in yoga) because if you don't you will never move forward. Another point I think is worth a mention here is that with yoga you learn something new about yourself, your abilities and your limits continuously.

Okay if you've got this far I have one last thought, don't forget, you have to have the not so good days to really appreciate the good.  Believe me when I say, that sometimes I feel like I can't balance to save my life, especially when I've let my diet go a bit, missed a few classes or not practiced at home, but once I realize I get right back to challenging myself and take it back where I want to be every time - In control of my health, because (for now) its all doable and handmade. No excuses.


Namaste.

Love 
Lou xoxo
0 Comments

Advice on constructing a bench cushion for the first time and threading a zipper slide onto zipper tape.

29/5/2015

0 Comments

 
Picture
Picture
It’s been a challenging but exciting past few weeks in the Luluké studio.  I’ve finally made the transition from having just one blog to two.  One simply called “Luluké, Create, Share, inspire” to bring you updates, news on challenges and (dare I say) tutorials, and the other called “The Button” which will continue to seek out, explore and highlight other handcrafters in and around Cleveland, Ohio.  


You may remember that some time (way back) I asked you to challenge me with a new project.  Sooooo... a friend of mine made the call recently.  She challenged me to make not just one, but two large bench cushions (approx. 27” x 42”) with piping for her newly renovated (and seriously gorgeous) basement.  I tell ya that girl’s got an eye for detail and style!
 
Picture
Picture
And because I like to give a shout out to anyone who deserves it for a job well done, and just in case you’re interested in hiring a contractor for renovation work the person responsible for this masterpiece is:  John Siegel, Siegel Construction, Telephone: 440 821 1762.
After I explained to my lovely friend that I've never done such a (big) project, her response was to look me straight in the eyes, smile and say “yes I know, but I want you to make them”.  How could I refuse?  I admit I hesitated a little, took a gulp then felt a flash of electric excitement and got to work immediately.  I had around 10 days (I was granted more time but wanted to meet the deadline of a special party she had planned).  I started by rushing to Schindler's Fabrics on the West Side of Cleveland and collected lots of samples for her to choose from.  Schindler's was the perfect choice due to having an endless supply and fantastic range of high end designer fabrics that come with a reasonable price tag.  Let’s just rewind a bit here… I first conquered my fear of driving in downtown Cleveland and passed from the East to the West (huge conquest - and conquered).  Well… it’s an interesting adventure when you originally learnt to drive on the other side of the road and the rules are different.  I also got to know the “ooooooh so lovely” Gregory at Schindler's, who couldn't have been more of a darling with his help and master upholsterer (and owner) Judy who assured me of the correct ways to approach the task at hand. 

We settled on fabric, trim and design.  Then as the project progressed, it literally grew bigger as it took shape, as you can see below:

I don't approach things halfheartedly (or give up easily) so here’s a quick rundown of what I learned firsthand about the thinking before you construct a bench cushion and how to tackle zips head on - should any of you decide you want to have a go yourself:
  • Think about how you want to construct your piece - there’s usually more than one way (i.e. zip or Velcro, piping or no piping, ready made piping or handmade piping etc.).
  • Think about how you will take the cover on and off the foam insert.  So if say for example you decide to inert a zipper, take the zipper across the back and at least 5” up the side panels from the rear of the cushion.
  • Watch a few upholstery videos to get a good idea of design and construction.  And again.  And again, if needed.  If you lose your direction during construction, revert back to them until you find your way again.  I used this one to help me along Kim's Upholstery, how to make a cushion cover.  My project needed the zipper to end in a different place to what's shown in the video, so I just took the cover off another seat cushion I have already with this feature and figured out how it was constructed.
  • If you've never made a bench cushion before and you’re feeling a little nervous, practice on something smaller first before you use expensive materials - especially if your customer has paid for them already.  I opted to making a small cushion first that turned out okay, and it has handmade piping (and I get to keep this one).
Picture
  • Don’t be afraid to ask the experts.  My experts in this case were Gregory and Judy from Schindler's.  They seemed delighted by my admittedly novice skill with this hand crafting opportunity and my tenacity to get it done.  I think it’s one of those skills that’s at risk of disappearing from our modern, mass produced world.
  • Take your time and don’t be afraid to change your original construction ideas.  It may just work out better.
  • Do the math right, to avoid repeated trips to the shops, especially if they are a distance away!  You can tell how I learned this one.
  • If you feel like you're running out of space, move your machine to a larger table (if you have one) and give yourself plenty of room.  I used our dining room table for this project.
  • If you’re using thick or heavy fabric and the project begins to get too heavy and starts to slip off your sewing machine, use an extra table on your left side to support the weight and balance of the fabric.  I used a folding table we use for parties.  And don’t pull too hard on the fabric because it may stretch out of shape. 
  • Use a heavy duty machine.  Well, I was way overdue for an upgrade and she’s a dream!
Picture
  • I can say with confidence (now) that zips are not a scary concept, once you know how.  I even mastered the art of a concealed zipper for this project!  Here's my first ever video tutorial on how to thread a zipper pull onto zipper tape from a roll:
Despite my friend's willingness to wait for the final product, I managed to get the bench cushions in place three hours before the party!  I could have tweaked them a little more but my friend was happy with them just the way they were and I've heard through the grape vine already that she is a very happy customer, which makes me feel like ... 
CHALLENGE ACCOMPLISHED!
Picture
In addition to creating and selling jewelry and bags in my shop, I'm always seeking out new adventures and experiences when it comes to handmade.  If you would like to challenge me to complete a project, see a new product in the shop, or a particular tutorial get in touch via handmadebyluluke@gmail.com.

With love,


Lou xoxox
0 Comments

    Author

    Lou Khayat, Owner of Luluké . 

    Lou's mission is to Create, Share and Inspire anyone who appreciates the world of handmade.  Here you will find updates, news on challenges, advice and the odd tutorial from the Luluké studio based in Shaker Heights, Ohio.  Like the Facebook page here to keep up with the latest from Luluké.


    Archives

    January 2016
    September 2015
    May 2015

    Categories

    All

    RSS Feed

Powered by Create your own unique website with customizable templates.